

The move from DD-WRT to OpenWrt on my Archer C7 v5 router was not as easy as hoped but still pretty much straightforward. Read here about how this was done.
You can find the OpenWrt webpage for the Archer C7 router with details and background information here on the official OpenWrt site*: [OpenWrt Wiki] TP-Link Archer C7 AC1750*.
Flashing from DD-WRT Control Panel
Surely the easiest way would have been to directly flash the OpenWrt firmware from within DD-WRT control panel under Administration --> Firmware Update.
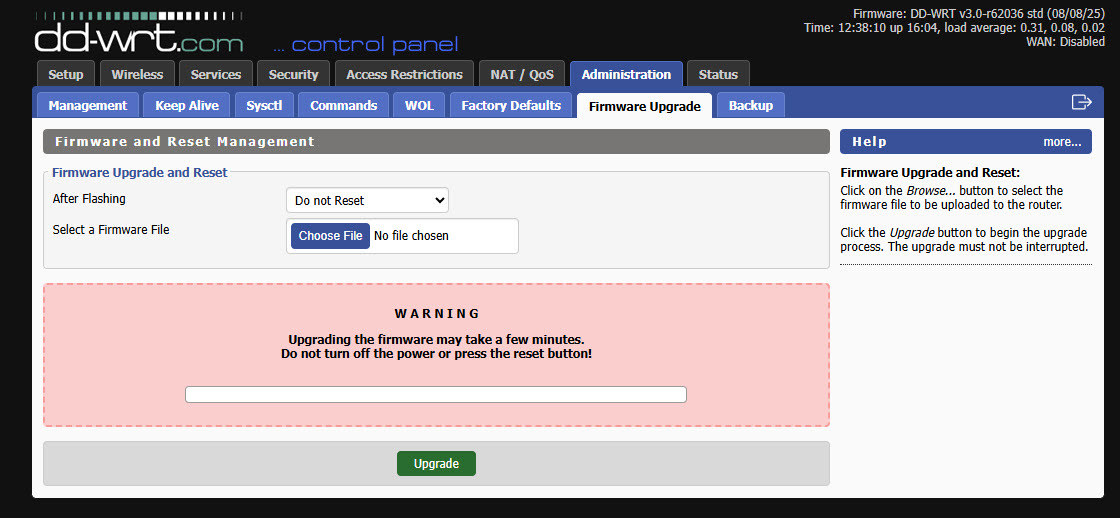
Some sites on the internet describe this approach as being a valid approach, but it did not work for us. The Archer C7 stayed on its DD-WRT firmware and did not flash the OpenWrt.
What we tried:
- Reset the router, now it runs vanilla DD-WRT
- Download the OpenWrt "Factory Image" firmware from site [OpenWrt Wiki] TP-Link Archer C7 AC1750*.
- Rename the file to factory.bin
- Connect to the router running DD-WRT on its default IP 192.168.1.1
- Set user name and password (because we had done a reset, see above)
- Go to tab Administration --> Firmware upgrade
- Select the OpenWrt factory.bin file and click update
It seems that it starts to flash but it stays on DD-WRT.
Installation of OpenWrt with Bootloader and Ethernet Port via TFTP
This installation approach is based on installing OpenWrt via TFTP (https://openwrt.org/docs/guide-user/installation/generic.flashing.tftp#installing_openwrt_via_tftp*).
When rebooting after a reset, the TP-Link Archer C7 tries to establish a connection to a TFTP server at a specific internet address, loads and flashes the file with the name ArcherC7v5_tp_recovery.bin
This file name is for the version v5 of the Archer C7. If you are having an Archer C7 with another version, replace the 5 in v5 with your version number.
Download the OpenWrt "Factory Image" firmware from site [OpenWrt Wiki] TP-Link Archer C7 AC1750*.
Rename the file exactly to ArcherC7v5_tp_recovery.bin
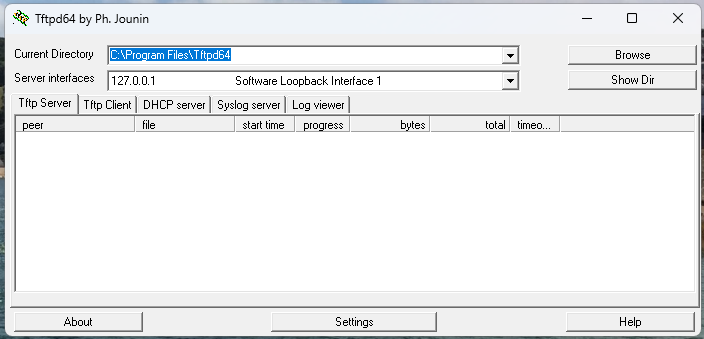
Running our PC on Windows, we used this TFTP64 tool: Toolhttps://tftpd32.jounin.net/tftpd32_download.html*
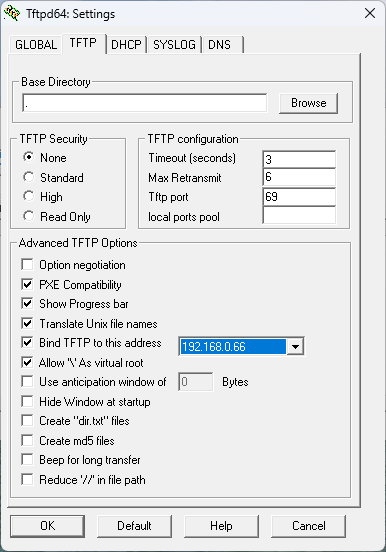
Set the IP address of your PC to 192.168.0.66 and subnet mask 255.255.255.0
Start the TFTP64 program
Click in Settings and adjust your settings on tab TFTP as per values from screenshot below:
Click on tab GLOBAL and adjust the settings as per screenshot below:
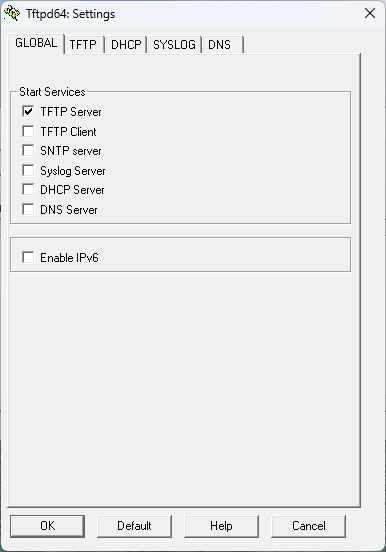
After you confirm the changes with OK, you need to restart TFTP.
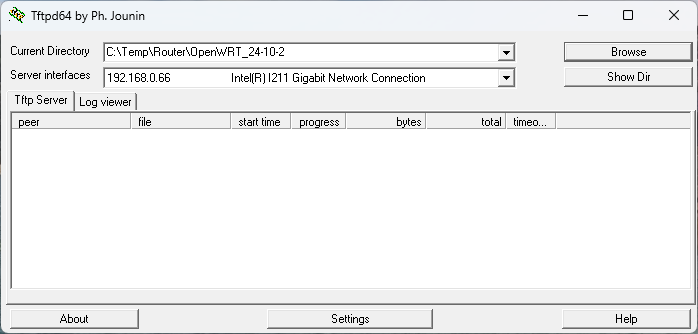
Under Server interfaces you should now see the entry referring IP 192.168.0.66. The server is ready now.
Click on Browse and select the directory where file ArcherC7v5_tp_recovery.bin is located.
Plug in your LAN cable into Archer's LAN port #1.
Press and hold (e.g. with a ball pen) the reset button, switch on the router and hold the reset button for approximately 7 sec while powering on your router.

![]()
The WPS led should light up (arrows up/down) indicating that the router looks for the specified file and downloads it onto the router.
Then the file is flashed to the router, indicated by flashing Power led WPS led (arrows up/down). This may take a few minutes until flashing is completed.
Once the new firmware was flashed to the router, change back your PCs LAN configuration to DHCP.
Now you should be able to find the freshly flashed OpenWrt on your router under address 192.168.1.1 and you can configure everything as needed.
*External link outside our influence and control. Please use with care.
