
The Raspberry Pi 4 (What is a Raspberry Pi?) is a very popular hardware for a home server. It comes with the essentials and is powerful enough for many use cases in small networks. Where Raspberry OS (or formerly Raspbian) was the standard operating system in the past, now the Linux Ubuntu operating system is a good alternative.
Raspberry Pi 4 as a Home Server
In a home server situation we assume that the server has to run all year long and around the clock (24/7). The Raspberry Pi is as a small server in smaller home networks a good choice as it comes with enough power for many server use cases and a comparatively low power consumption (Some smart guys have calculated a consumption of approximately 41 kWh per year running 24/7 whereas a small Desktop computer was identified with a power consumption of around 543 kWh).
The Raspberry Pi 4 comes with an Ethernet network connector, 4 USB connectors and 2 HDMI mini connectors. In our home server use case we run the Raspberry Pi 4 configured headless, that means without monitor, keyboard, and mouse.
In earlier installations we used the Linux operating system Raspberry OS (or formerly Raspbian), but now we run it with the Linux Ubuntu Server in 64 bit version.
Home Server Equipment
The basic equipment for a Raspberry Pi 4 based home server is just
- The Raspberry Pi 4 board
- A micro SD card of good quality (e.g. SanDisk Extreme with 32 GB)
- Raspberry Pi power supply
- External Hard Drive 2.5" with USB 3 and sufficient capacity (ours has 5TB)
- Network Cable to connect to your home network by Ethernet
- A case for the Pi because you don't want your server just as a naked board

The Ubuntu Server Operating System for the Raspberry Pi

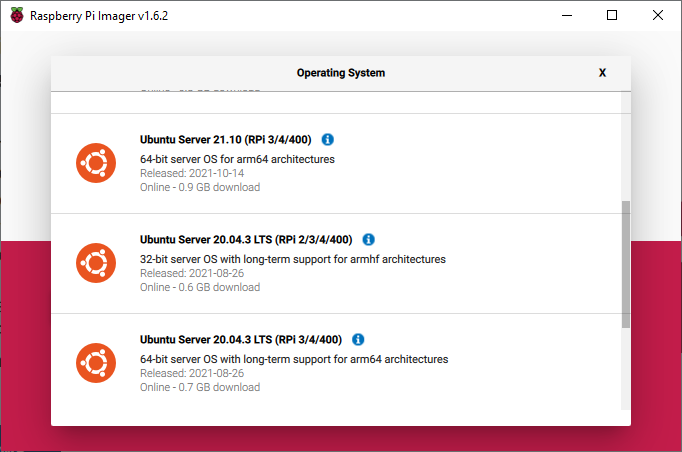
The Ubuntu operating system is available as an option in the Raspberry Pi Imager tool.
More details and the download of Raspberry Pi Imager is available ob the Raspberry Pi Website Raspberry Pi OS – Raspberry Pi.
The use of the Raspberry Pi Imager is probably the easiest way to transfer Ubuntu to the microSD card for the Raspberry Pi.
In the Raspberry Pi Imager several Ubuntu versions are available, for our home server on a Raspberry Pi 4 (!) we go for the Ubuntu Server 64 bit version.
32 bit vs 64 bit
"The Raspberry Pi 2 only supports 32 bits, so that’s an easy choice. However the Raspberry Pi 3 and 4 are 64 bit boards. According to the Raspberry Pi foundation, there are limited benefits to using the 64 bit version for the Pi 3 due to the fact that it only supports 1GB of memory; however, with the Pi 4, the 64 bit version should be faster."
(This quote is from the Ubuntu web site at: Install Ubuntu on a Raspberry Pi | Ubuntu)
Regular or LTS - what's the best option for a home server?
There are two Ubuntu server versions on the market to follow Ubuntu's time-based release planning. Regular main releases are published every 6 months and are supported for 9 months, whereas long term support (LTS) releases are supported for 5 years and a new major LTS release is published every two years.
Within the support phase of a release (i.e. 9 months for a regular release, 5 years for the LTS), Ubuntu packages are only updated to
- fix security vulnerabilities
- fix other high-impact bugs, e.g. those which cause data loss
- do very conservative, unintrusive bug fixes with substantial benefit and very low risk.
When you go for the regular version you can get the latest packaged software versions and improvements every 6 months, but you also have to update your home server after 9 months latest, because you do not want to run a home server with an out of maintenance operating system.
When you go for the LTS version instead, it will receive security fixes and selected bug fixes only, as explained above. You can stay on this release for up to 5 years (calculated from the date when the LTS release was published).
For many, the LTS option is the better choice for their home server. They may not need the latest software features and are good to go with the packaged versions for a few years. And once the next LTS major release becomes available in its 2-year-frequency, they can update when convenient without having the pressure to do a full release upgrade every 9 months latest if they would be on a regular release.
External Link to Ubuntu Wiki Release Schedule: Releases - Ubuntu Wiki
How to install Ubuntu Server on your Raspberry Pi
There is a good tutorial available on the Ubuntu website that explains the steps: How to install Ubuntu Server on your Raspberry Pi | Ubuntu
Having said that, you would like to consider a couple of additional aspects for a Home Server installation:
Overview: Prerequisites
For the setup we need:
- Raspberry Pi 4
- A computer with a microSD card drive
- A USB-C power cable the Pi 4
- A Wi-Fi network or an ethernet cable with an internet connection
If everything goes as per plan, we do not need a monitor, keyboard, or mouse for the Raspberry Pi because we want to run the home server headless.
Prepare the SD Card
We want to install the latest available (which may be more current than that what you can see on this screenshot) Ubuntu server 64 bit (either regular release or LTS, whatever you prefer). To prepare the SD card follow the steps as explained in the Ubuntu tutorial.
WiFi or Ethernet
We would like to connect the Home Server directly to our home network with Ethernet (i.e. cable, not WiFi) and assign a stable IP address within the home network.
Before the next step, identify an appropriate home server internal IP address that can be assigned directly to the home server. Make sure, that this address is not in use by any other device and is not from the pool of IP addresses your DHCP may assign automatically.
Our router (which runs the DHCP server to assign network addresses) is configured for an DHCP address range starting at 192.168.1.100 and we choose to use the IP address 192.168.1.10 for the home server.
To configure Ethernet with a static IP address, you can prepare the configuration before the first boot by editing file network-config on the SD card. This file contains the netplan-compatible configuration which cloud-init will apply on first-boot; it will not update the config after the first boot. (In case you missed this and want to change the IP address to static later, check the article Change network configuration on Ubuntu Server).
Relevant for us is not the section for wifis: but ethernets: to set a static IP.
To set a static IP you need to replace the
dhcp4: true
line in the network-config file with lines that specify the intended IP address as well as its default gateway and DNS server. You can do this for either the eth0 or wlan0 interface (or both), but as since we want to configure the Ethernet connection, we only change the entry for eth0:
It is important that you get the indenting right for this work correctly!
For example, if you were planning to give the pi the address 192.168.1.10 in the 192.168.1.0/24 subnet with a default gateway of 192.168.1.1 and a DNS server of 192.168.1.1, then the configuration file can be changed as follows:
ethernets:
  eth0:
    addresses:
      - 192.168.1.10/24
    gateway4: 192.168.1.1
    nameservers:
      addresses: [192.168.1.1]
    optional: true
Boot Ubuntu Server
Before you connect your Raspberry Pi to the power supply, make sure that the Ethernet network cable with a connection to your home network is plugged into the Raspberry Pi.
Follow the steps explained in "Boot Ubuntu Server" of the tutorial.
Since we run the Raspberry Pi headless, i.e. without any monitor or keyboard, it is handy that the SSH server is activated on Ubuntu already. It may take 2-3 minutes before the Pi is ready, so wait a moment before you try to connect with your SSH client.
To access the your server using SSH, you need an SSH client. For access from a Windows system, PuTTY is a good option: PuTTY - Telnet and SSH Client for Windows.
The server IP address you enter into your SSH client is the one configured for the Pi; in our example as per above it is 192.168.1.10.
The user for login is ubuntu and the initial password ubuntu
The password needs to be changed immediately after the first login, then Ubuntu does a logout and you need to re-login with the new credentials.
Update all Packages to the Latest Version
Next, you want to update all packages to the latest version. Enter on the command line:
sudo apt update
sudo apt upgrade
The update may take some time, let's say around 15-30 minutes.
Depending on the current version and updates needed, Ubuntu may want to update the kernel version, too:
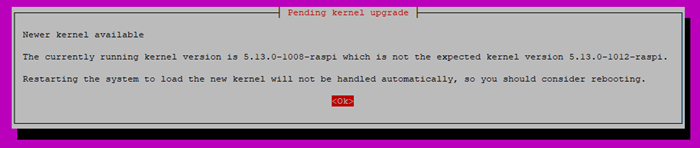
Once the kernel update was done and you are back on the command line, you should reboot your system:
sudo reboot
That's it! Now your basic installation of the Raspberry Pi Home Server is done!
Change the Host Name
The new server does have the host name ubuntu by default.
If you want to change it, have a look at the article Set host name on Ubuntu Server. This step is purely optional and of course you can keep the default host name.
Other tools you may want to install on your new home server
net-tools
The net-tools package on Ubuntu server includes useful tools for controlling the network subsystem of the Linux system.
To install net-tools, just enter:
sudo apt install net-tools
Midnight Commander File Manager
When managing your new server without a Desktop being installed, you need to be quite savvy with the Linux command line.
But sometimes, especially if you need to walk through several folders and directories, a file manager becomes useful.
Midnight Commander is a file manager for the command line and therefore it is a valuable tool for the system administrator: Install Midnight Commander File Manager on Ubuntu.
Install an external Hard Drive to your Raspberry Pi
Currently the only storage device that is connected to your Raspberry Pi is the microSD card. Depending on the use cases you are going to run on your new home server, you may need additional storage. Check this article for an overview how to attach an external hard drive to your Raspberry Pi: Attach USB hard drive storage to your Raspberry Pi on Ubuntu
Use cases for your new home server
Now, the basics are done and your new home server is up and running in your home network. But that's only the beginning. You now need to decide about the use cases that you want to implement on your home server.